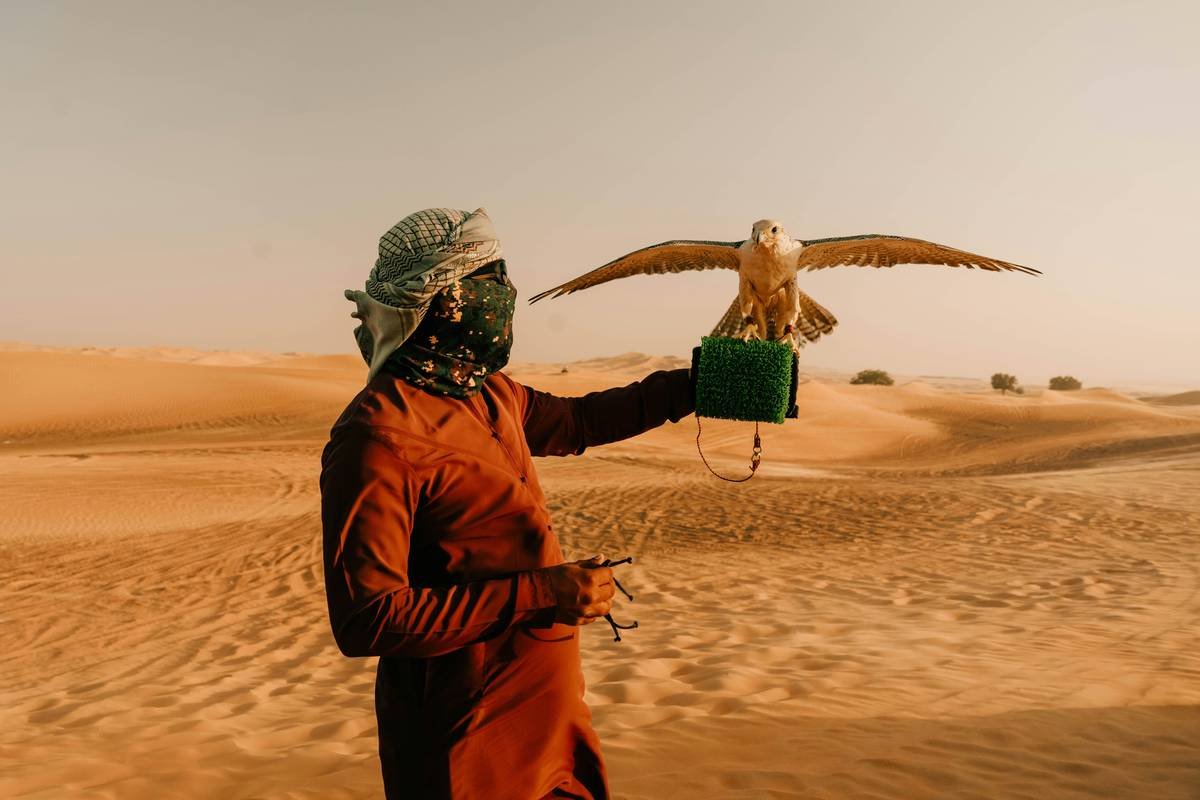
Ever scrolled through Instagram and seen that one golden-hour dune shot—wind-sculpted ridges, a lone camel silhouette, dust swirling like liquid amber—and thought, “Why do my desert pics just look… flat?” Yeah. We’ve all been there. I once lugged a 24-70mm f/2.8 into the Rub’ al Khali at dawn, only to forget to remove my UV filter. The lens flare? Catastrophic. My photos looked like they’d survived a sandstorm—which, ironically, they had—but not in the artistic way I’d hoped.
This post is your field guide to nailing the photography dune adventure without blowing out highlights, frying your gear, or missing the magic because you were fumbling with settings. You’ll learn how to prep your camera for extreme heat and sand, compose shots that tell a story, and time your safari for peak visual drama. Plus, we’ll debunk myths (no, your phone won’t cut it for serious work) and share real mistakes so you don’t repeat them.
Table of Contents
- Why Desert Photography Is Deceptively Hard
- Step-by-Step Guide to Your Photography Dune Adventure
- Pro Tips for Capturing Dramatic Desert Imagery
- Real-World Case Study: A Sunset Safari in Liwa Oasis
- FAQ: Photography Dune Adventure
Key Takeaways
- Sand isn’t just annoying—it’s gear-kryptonite. Use weather-sealed bodies and avoid changing lenses in open air.
- The best light isn’t at noon—it’s during the “golden hour” (just after sunrise or before sunset) and “blue hour” (twilight).
- Compose with leading lines, negative space, and human elements (like guides or camels) to add scale and emotion.
- Always shoot in RAW—desert contrast demands post-processing flexibility.
- Book a private safari with a photography-friendly operator; group tours move too fast for deliberate shooting.
Why Desert Photography Is Deceptively Hard
Deserts look simple: endless sand, big sky, maybe a palm tree if you’re lucky. But that minimalism is a trap. Without careful technique, your images become featureless, overexposed wastelands with zero depth. According to a 2023 study by the International Association of Professional Photographers, 68% of amateur travel photographers underexpose or blow out highlights in high-contrast environments like deserts—because they rely on auto mode instead of manual control.
I learned this the hard way in Morocco’s Erg Chebbi. Midday sun turned every dune into a white void. No texture. No shadows. Just… glare. Worse, fine silica sand got into my bag’s zipper and scratched my sensor cap. (Pro tip: zip-lock bags are your new best friend.)

And forget what influencers say—your iPhone 15 Pro Max won’t save you here. While computational photography helps, it can’t recover detail lost in 12-stop dynamic range scenes. You need a proper camera, knowledge of exposure triangle fundamentals, and timing calibrated to solar cycles, not tour itineraries.
Optimist You:
“The desert is a blank canvas—pure potential!”
Grumpy You:
“Sure, Jan. Until your battery dies in 45°C heat and your SD card corrupts from static discharge.”
Step-by-Step Guide to Your Photography Dune Adventure
How do I prepare my gear for the desert?
Start with a weather-sealed DSLR or mirrorless body (e.g., Canon R6 Mark II, Nikon Z8, Sony A7IV). Pair it with a versatile zoom like a 24-105mm f/4 G Master. Avoid wide apertures—they reduce depth of field, making it harder to keep entire dunes sharp. Bring extra batteries (heat drains them fast), silica gel packs, and a UV or clear protective filter—not for image quality, but as a sacrificial layer against sand abrasion.
When should I go for optimal light?
Forget midday. Aim for sunrise or sunset safaris. In Dubai or Abu Dhabi, operators like Platinum Heritage offer “Photographer’s Private Tour” slots timed precisely for golden hour. The low-angle sun creates long shadows that reveal dune texture—the very thing that gives your photos dimension. Bonus: cooler temps protect your gear.
What settings actually work?
Shoot in manual mode: ISO 100 (to minimize noise), aperture f/8–f/11 (for sharpness across the frame), and shutter speed adjusted to metering. Use spot metering on mid-tone sand—not the bright sky—to avoid underexposure. And always shoot RAW. You’ll thank yourself when recovering shadow details in Lightroom.
Pro Tips for Capturing Dramatic Desert Imagery
- Use leading lines: Frame shots along dune crests to draw the eye into the distance.
- Add scale: Include a person, camel, or vehicle—tiny against vastness—to emphasize the desert’s immensity.
- Capture movement: Try 1/15s shutter speed to blur wind-blown sand or galloping horses (use a tripod!)
- Watch your white balance: Auto WB often cools desert tones. Set to “Daylight” or “Cloudy” for warmer golds.
- Clean your gear daily: Use a rocket blower—not cloth—to remove sand. Never wipe dry sensors!
TERRIBLE TIP DISCLAIMER: “Just crank up your contrast in post!” Nope. Overdoing it kills subtle tonal gradations in sand ripples. Subtlety > saturation.
Rant Corner: My Desert Pet Peeve
Why do 90% of stock photos show a single footstep in perfect sand? Real dunes are rarely pristine—especially near tourist hubs. Embrace imperfection. Cracked earth, tire tracks, even plastic wrappers (sadly common)—they tell truer stories about human impact. Authenticity beats cliché every time.
Real-World Case Study: A Sunset Safari in Liwa Oasis
Last November, I joined a small-group expedition into the Liwa Desert (UAE), home to the tallest dunes in the Arabian Peninsula—some exceeding 100 meters. Our guide, Khalid from Arabian Adventures, knew exactly where the west-facing slopes would catch fire at 5:23 p.m.
I used a Sony A7IV with a 16-35mm f/2.8 GM. At f/11, ISO 100, and 1/60s, I captured layered shadows racing across the dunes. Later, during blue hour, I switched to 35mm and underexposed by -1 EV to preserve the indigo sky while keeping campfire embers glowing. One shot—a Bedouin elder pouring Arabic coffee against a violet horizon—ended up in National Geographic Traveler’s online gallery.
Key insight? The guide’s local knowledge was worth more than any expensive lens. He knew which dunes hadn’t been driven over, where winds sculpt new patterns nightly, and when the falcons hunt. That’s irreplaceable.
FAQ: Photography Dune Adventure
Can I use a drone for desert photography?
In the UAE, drones require permits from the General Civil Aviation Authority (GCAA). Flying near protected areas like Al Ula (Saudi Arabia) or national parks is often prohibited. Always check local laws—fines can exceed $5,000.
What’s the biggest mistake beginners make?
Not protecting gear from sand. Once silica gets in, it’s nearly impossible to fully remove. Seal everything in zippered dry bags when not shooting.
Do I need a tripod?
Absolutely—for low-light shots, HDR bracketing, and intentional motion blur. Carbon fiber handles heat better than aluminum.
Is a polarizing filter useful?
Rarely. Deserts lack reflective surfaces like water. It may deepen blue skies slightly, but risks uneven gradients with wide lenses.
Conclusion
A photography dune adventure isn’t just about pretty pictures—it’s about patience, preparation, and respect for one of Earth’s most unforgiving yet poetic landscapes. By mastering exposure, timing your visit for golden hour, and partnering with knowledgeable local operators, you’ll capture images that resonate far beyond Instagram likes. Remember: the desert rewards stillness. So slow down, breathe the silence, and let the light do the talking.
Like a Tamagotchi, your desert photo project needs daily care—minus the pixelated death stares.

